Description
Target Audience: Homeschool moms + Preschool teachers + Parents
Primary Keyword: “pre-k fine motor skills” (1,900 searches/mês)
Secondary Keywords: “handwriting readiness”, “pre-k cutting skills”, “pencil grip 4 year old”, “writing preparation preschool”
Meta Description (159 caracteres): “Pre-K fine motor activities for ages 4-5. Handwriting readiness, pencil grip, cutting skills & kindergarten prep. Hands-on activities + free printables!”
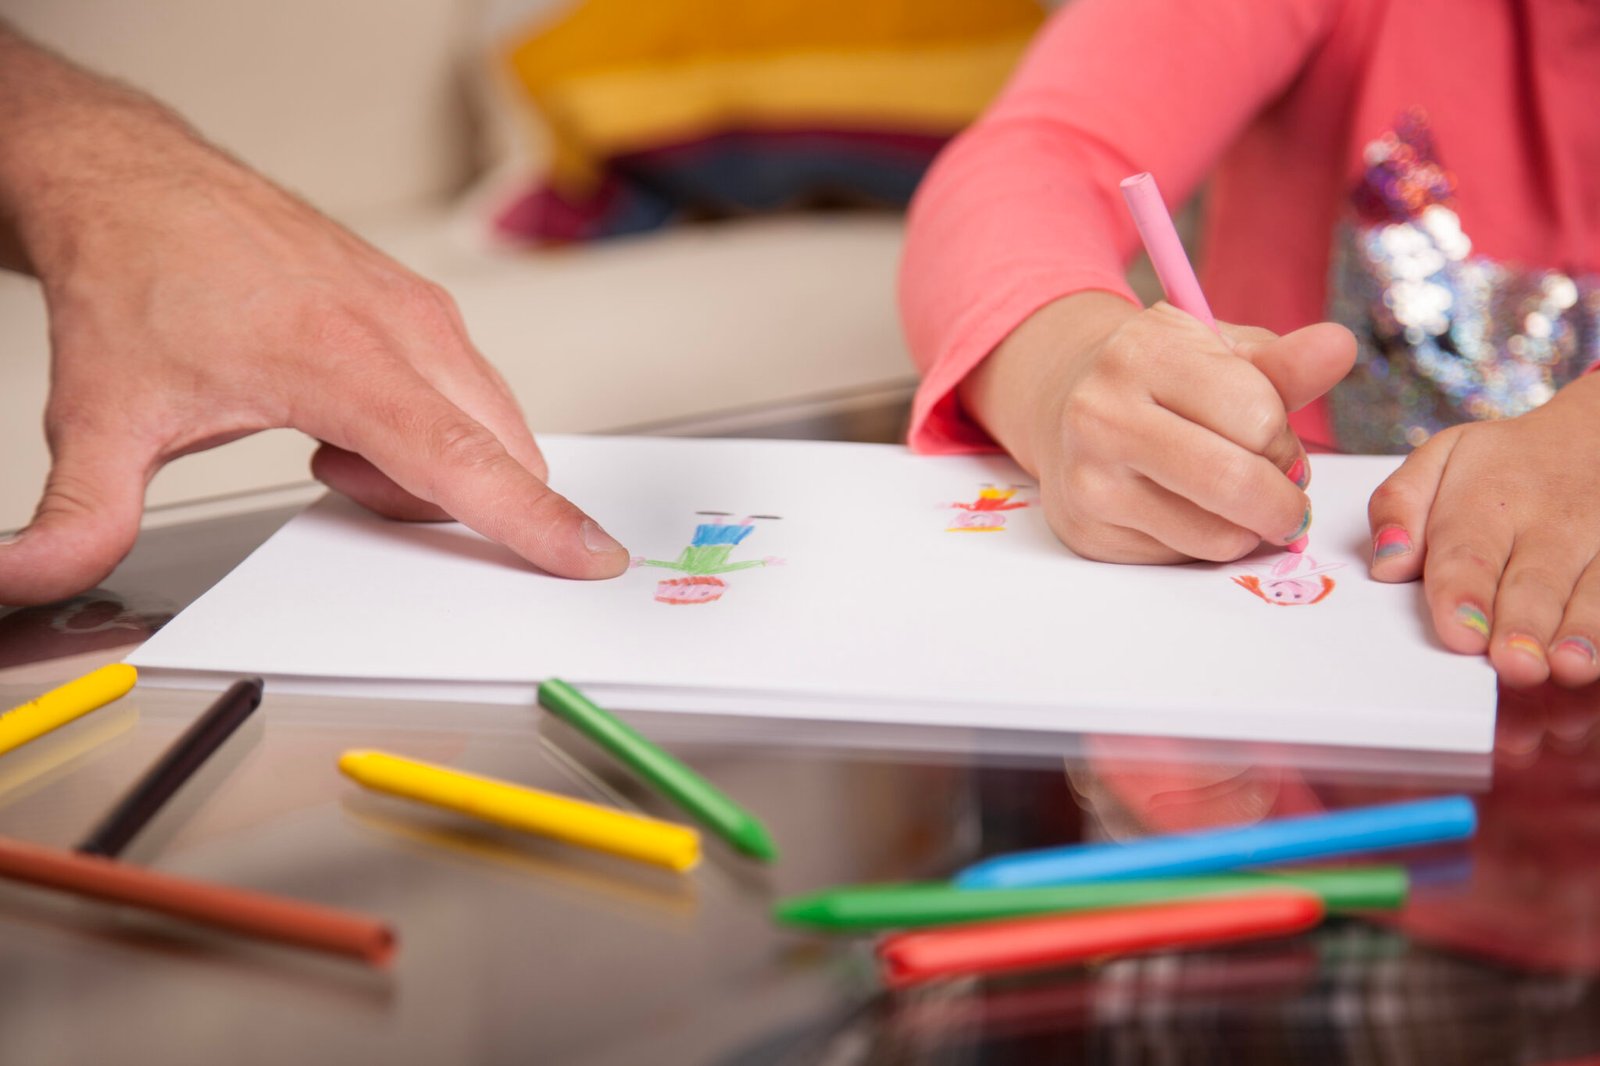
Your four-year-old is starting to draw recognizable pictures—actual people with heads, bodies, and stick arms! They’re cutting on lines (mostly), writing some letters, and showing genuine interest in “big kid” writing. Their little hands are getting stronger and more capable every day.
This is the critical year when fine motor skills consolidate. When scribbles transform into letters. When fisted grips evolve into proper pencil holds. When frustrating tasks become achievable, confidence-building accomplishments.
But here’s what you need to know: Kindergarten teachers consistently rank fine motor skills—especially handwriting readiness—as one of the TOP indicators of school success. A child who enters kindergarten with strong hands can focus on learning content. A child who struggles to hold a pencil, cut paper, or manipulate materials spends energy on physical tasks that should be automatic.
Whether you’re a homeschool mom planning your Pre-K year, a preschool teacher preparing students for kindergarten, or a parent wanting to support your child’s development, this guide gives you everything you need to build strong, capable hands.
What you’ll discover:
- Fine motor developmental milestones for ages 4-5
- The progression to proper pencil grip
- Teaching handwriting readiness systematically
- Advanced cutting skills for kindergarten prep
- 50+ hands-on activities (no-prep and low-prep!)
- When to worry vs. when to relax
- How to make practice fun, not frustrating
- Free printable fine motor activities
Let’s prepare those little hands for kindergarten success!
Why Fine Motor Skills Matter for Kindergarten Readiness
Fine motor skills are the small muscle movements in hands, fingers, and wrists. These are the skills that allow children to:
- Hold a pencil and write legibly
- Cut with scissors accurately
- Manipulate small objects (puzzle pieces, small toys, manipulatives)
- Button, snap, zip clothing independently
- Use utensils properly
- Turn pages in books
- Tie shoelaces
- Complete self-care tasks independently
Why kindergarten teachers care about fine motor skills:
Academic Impact:
- Writing letters and numbers
- Cutting out shapes and projects
- Manipulating math manipulatives
- Using art supplies (glue, tape, markers)
- Completing worksheets and activities
Independence Impact:
- Opening lunchboxes and containers
- Putting on and taking off jacket
- Managing bathroom needs
- Organizing materials
- Taking care of belongings
Confidence Impact:
- Children with weak fine motor skills get frustrated
- Tasks take longer, creating stress
- They avoid activities they find difficult
- Confidence suffers when they see peers succeeding
The bottom line: Strong fine motor skills = academic success + independence + confidence.
Fine Motor Developmental Milestones for Ages 4-5
Understanding what’s typical helps you set appropriate expectations and provide the right level of challenge.
Beginning of Pre-K (Age 4.0-4.5)
Pencil/Crayon Skills:
- Holds crayon/marker with modified tripod grip (emerging)
- May still use fisted grip sometimes
- Colors with some control (staying mostly within large areas)
- Draws recognizable pictures (people with 2-4 body parts)
- Copies simple shapes: circle, cross (+), square (emerging)
- Beginning to trace simple lines and shapes
Cutting Skills:
- Snips paper easily
- Cuts along straight lines (1-2 inches)
- Beginning to cut curved lines (with difficulty)
- May still have awkward scissor hold
- Can cut out simple shapes (with wide margins)
Manipulation Skills:
- Strings medium-sized beads
- Builds complex structures with blocks
- Completes 12-20 piece puzzles
- Uses glue bottles and glue sticks (may use too much!)
- Can fold paper in half
- Stacks small objects
Self-Care Skills:
- Buttons large buttons (emerging)
- Zips jacket (if started for them)
- Puts on shoes (may be wrong feet)
- Uses fork and spoon well
- Pours from small pitcher (with some spills)
Middle of Pre-K (Age 4.5-5.0)
Pencil/Crayon Skills:
- Uses tripod grip more consistently
- Colors staying within lines (with effort)
- Draws people with 4-6 body parts
- Copies shapes: circle, cross, square, triangle
- Writes first name (letters may be inconsistent sizes/spacing)
- Writes some other letters from memory
- Beginning to write on lines
Cutting Skills:
- Cuts along straight lines accurately
- Cuts curves and zigzags
- Cuts out simple shapes (circle, square) staying close to lines
- Beginning to cut complex shapes
- Proper scissor grip emerging
Manipulation Skills:
- Strings small beads
- Completes 20-30 piece puzzles
- Uses tape (may use too much!)
- Can fold paper into simple shapes
- Manipulates small fasteners (snaps, large buttons)
Self-Care Skills:
- Buttons most buttons independently
- Zips jacket independently
- Puts shoes on correct feet (usually!)
- Uses knife to spread (butter, peanut butter)
- Pours without spilling (mostly)
End of Pre-K (Age 5.0-5.5) – Kindergarten Ready!
Pencil/Crayon Skills:
- Consistent tripod grip
- Colors neatly within lines
- Draws detailed pictures (people with 6+ body parts, backgrounds)
- Copies all basic shapes including diamond
- Writes first name neatly and legibly
- Writes most letters from memory
- Writes numbers 1-10
- Beginning to write simple words
- Writes on lines with appropriate spacing
Cutting Skills:
- Cuts accurately on lines (straight and curved)
- Cuts out complex shapes (animals, irregular shapes)
- Cuts following a pattern or outline precisely
- Uses scissors for extended periods without hand fatigue
- Proper scissor grip automatic
Manipulation Skills:
- Completes 30-50 piece puzzles
- Uses tape, glue, and staplers appropriately
- Can fold paper following directions
- Ties simple knots (bows emerging)
- Manipulates small objects with precision
Self-Care Skills:
- All buttons, snaps, zippers independently
- Ties shoelaces (emerging—many still learning)
- Uses all utensils properly
- Manages all lunch containers
- Complete bathroom independence
Red Flags at Age 5:
Talk to your pediatrician if your child:
- Uses only fisted grip with no progression
- Avoids all fine motor activities
- Can’t manipulate objects with fingers (everything with whole hand)
- Shows no interest in drawing or coloring
- Can’t stack blocks or complete simple puzzles
- Has extreme difficulty with basic self-care (dressing, eating)
Early intervention makes a huge difference! Occupational therapy can help children catch up quickly.
The Progression to Proper Pencil Grip
Pencil grip develops gradually. Understanding the progression helps you support it without forcing.
The Developmental Stages of Pencil Grip
Ages 1-2: Fisted Grip (Palmar Supinate) Child holds crayon in fist, whole arm moves to draw. Totally normal!
Ages 2-3: Digital Pronate Grip Holds crayon with fingers but still moves entire arm to draw. Emerging finger control.
Ages 3-4: Modified Tripod Grip Beginning to hold pencil with thumb, pointer, and middle finger, but grip is inconsistent. May still revert to fisted grip when tired or frustrated.
Ages 4-5: Tripod Grip Emerging Holds pencil correctly (thumb, pointer, middle finger) more consistently. Movement comes from fingers and wrist, not whole arm. Still developing strength and endurance.
Ages 5-6+: Dynamic Tripod Grip Mature pencil grip. Fingers move the pencil fluidly. Can write for extended periods without fatigue.
Important: Some children develop mature grip by age 5; others not until age 6-7. Both are normal IF progression is happening.
How to Encourage Proper Grip (Without Nagging)
- Build Hand Strength First You can’t have good pencil grip without strong hands!
Daily activities:
- Playdough (THE BEST hand strengthener!)
- Squeezing sponges, spray bottles
- Using tweezers, tongs, clothespins
- Climbing, hanging from bars
- Use Short Writing Tools Break crayons in half. Use golf pencils. Short tools naturally encourage tripod grip because children can’t grip them with their whole fist.
- Provide Triangular-Shaped Crayons/Pencils The three sides naturally position fingers in tripod placement.
- Try Pencil Grips Rubber grips that slide onto pencils. They position fingers correctly. Many styles available—experiment to find what works!
- Use Vertical Surfaces Tape paper to wall or use an easel. Vertical surfaces naturally encourage proper wrist position and grip. Drawing on walls = easier than drawing at a table!
- Practice with Different Tools Vary writing tools: thick markers, thin markers, crayons, colored pencils, chalk, paint brushes. Each requires slightly different grip, building flexibility.
- Don’t Over-Correct Constant nagging creates resistance and frustration. Gently show proper grip, provide tools that encourage it, but don’t make it a battle.
If grip isn’t improving by age 5-5.5, talk to pediatrician about occupational therapy evaluation.
Teaching Handwriting Readiness Systematically
Handwriting is complex! Before children can write letters, they need foundational skills.
Pre-Writing Skills (The Foundation)
- Hand Dominance By age 4-5, hand dominance should be emerging (left or right). If child is still switching hands constantly at age 5, mention to pediatrician.
- Crossing Midline Can child reach across their body with one hand to pick up something on the other side? This is essential for writing (writing left to right requires crossing midline).
- Hand-Eye Coordination Can they coordinate what they see with what their hands do? (Puzzles, threading beads, catching balls)
- Bilateral Coordination Using both hands together in coordinated way: one hand holds paper steady while other writes, one hand holds string while other strings bead.
- Pincer Grasp Picking up small objects with thumb and pointer finger (not whole hand). Essential for pencil control.
Activities that build these:
- Cutting (uses both hands coordinately)
- Stringing beads (pincer grasp + bilateral coordination)
- Puzzles (hand-eye coordination)
- Reaching games (crossing midline)
Pre-Writing Shapes (Practice Before Letters)
Before writing letters, children should master these pre-writing strokes:
Vertical line |
Horizontal line —
Circle O
Cross +
X
Square □
Triangle △
Diagonal lines / \
Why these matter: Every letter is made up of these basic strokes! Master these shapes = letter formation becomes easier.
Progression:
- Imitate (watch adult draw, then child draws)
- Trace (trace over adult’s line)
- Copy (look at shape, draw own version)
- Draw from memory
Practice methods:
- Large scale first: draw in air, on whiteboard, with sidewalk chalk
- Then smaller: paper with markers
- Then smallest: paper with pencil
Letter Formation Sequence
Don’t teach letters alphabetically! Teach by formation difficulty.
Easiest Letters (Start Here): L, T, I, H, E, F (all vertical and horizontal lines)
Next: C, O, A, D, P, B, R (curves and circles)
Then: V, W, X, Y, Z (diagonal lines)
Hardest: K, M, N, Q, S (complex strokes, curves, diagonals combined)
Lowercase comes AFTER uppercase is solid!
Most Pre-K programs focus on uppercase letters. Lowercase is typically taught in kindergarten.
How to Teach Letter Formation:
- Multi-Sensory Introduction
- Visual: See the letter
- Auditory: Hear the formation directions
- Kinesthetic: Form letter with body or movement
- Tactile: Touch and trace the letter
- Verbal Directions Use consistent language. Example for letter L: “Start at the top. Pull down. Stop. Slide right.”
- Practice in Multiple Ways
- Form with playdough
- Write in sand/salt tray
- Paint with water on chalkboard
- Trace with finger on sandpaper letter
- Rainbow write (trace same letter multiple times with different colors)
- Write with marker on whiteboard
- Finally: Write with pencil on paper
- Use Lines and Boundaries Help children understand:
- Letters sit ON the line
- Tall letters touch the top
- Short letters stay in the middle
- Letters with tails go below the line
Start with widely spaced lines. Gradually narrow spacing.
Get Free Learning Activities!
Join thousands of parents and teachers who receive our best activities, tips, and printables every week. Plus, get instant access to our exclusive resource library!
No spam, ever. Unsubscribe anytime.
Teaching Cutting Skills Progressively
Cutting is one of the most important Pre-K fine motor skills—and one that requires systematic teaching.
The Cutting Skills Progression
Stage 1: Snipping (Preschool/Early Pre-K) One snip at a time. Cut fringe, cut straws, make confetti.
Stage 2: Cutting Straight Lines (Early Pre-K) Hold paper with one hand, cut forward in straight line with other hand. Start with 1-inch lines, progress to longer.
Stage 3: Cutting Curved Lines (Mid Pre-K) Gentle curves. Turn the paper, not the scissors!
Stage 4: Cutting Angles and Zigzags (Mid-Late Pre-K) Sharp turns. Stop, reposition, continue cutting.
Stage 5: Cutting Shapes (Late Pre-K) Cut circles, squares, triangles staying on lines.
Stage 6: Cutting Complex Shapes (End Pre-K/Kindergarten) Cutting animals, irregular shapes, detailed pictures.
How to Teach Cutting
Proper Scissor Hold:
- Thumb in small hole (thumb on top!)
- Two fingers in large hole
- Scissors point away from body
- Elbow stays down (not up in the air)
The Helping Hand:
- Non-cutting hand holds and turns the paper
- Paper moves, scissors stay mostly still
- This is HARD to coordinate—practice!
Common Cutting Mistakes:
❌ Holding scissors sideways or upside down
✅ Thumb on top, pointing away
❌ Moving scissors around paper
✅ Turn paper, scissors cut forward
❌ Opening scissors too wide (past 90 degrees)
✅ Small snips, scissors mostly stay together
❌ Using both hands to squeeze scissors
✅ One hand cuts, other hand holds paper
Cutting Practice Sequence:
- Snipping Practice
- Snip straws into tiny pieces
- Cut playdough “snakes”
- Make paper confetti
- Cut fringe on paper edge
- Straight Line Practice Progressively longer lines:
- 1 inch lines
- 3 inch lines
- 6 inch lines
- Full page length
- Curved Line Practice
- Gentle curves
- Wavy lines
- Spiral (advanced!)
- Shape Cutting
- Cut out large simple shapes (wide margins okay)
- Progress to staying on lines
- Cut out small shapes
- Cut detailed shapes
Important: Use proper child-safe scissors! Right-handed vs. left-handed scissors actually matter—they cut differently.
50+ Pre-K Fine Motor Activities (Hands-On & Fun!)
These activities build hand strength, finger dexterity, and control—all preparing children for kindergarten demands.
Playdough Activities (The #1 Hand Strengthener!)
- Free Play Playdough Just squishing, rolling, and manipulating builds tremendous hand strength. No activity needed—this IS the activity!
- Rolling Playdough Snakes Roll with hands to make “snakes.” This rolling motion strengthens hands and wrists.
- Pinching Playdough Use pincer grasp (thumb and pointer) to pinch and pull playdough. Strengthens the exact muscles used for pencil grip!
- Playdough Letters Form letters with playdough “snakes.” Practice letter formation while building hand strength.
- Playdough Cutting Cut playdough snakes with scissors. Easier than paper—perfect for practicing scissor motion!
- Hide & Seek in Playdough Hide small objects (beads, buttons, coins) in playdough. Child digs them out with fingers. Strengthens hands!
- Playdough Tools Use cookie cutters, rolling pins, plastic knives, play scissors. Tool use builds diverse hand movements.
- Imprint & Stamp Press objects into playdough to make prints: forks, toy cars, legos, shells. Requires controlled pressure.
Cutting Activities (Progressive Difficulty)
- Cutting Straws Simple snipping practice. Each cut makes a satisfying piece!
- Fringe Cutting Give strip of paper. Cut from edge toward middle (not all the way through). Makes “fringe.”
- Cutting Playdough (Already mentioned but worth repeating—excellent practice!)
- Straight Line Cutting Practice Use our free printables with progressive difficulty: short lines → long lines → wide lines → thin lines.
- Cutting Shapes Simple shapes first (circles, squares), progress to complex (hearts, stars, animals).
- Cutting Out Magazine Pictures Find pictures in magazines. Cut them out. Make collages!
- Cutting Food Real-life practice! Cut sandwiches, cheese slices, fruit with butter knife or child-safe scissors.
- Spiral Cutting Advanced! Draw spiral on paper. Cut along spiral line. Very challenging!
Pincer Grasp Activities (Thumb + Pointer Finger)
- Tweezers Transfer Use tweezers or tongs to move small objects (pom poms, cotton balls, beads) from one bowl to another.
- Sticker Peeling Peel stickers off sheet. The pincer grasp required strengthens fingers!
- Cheerio Necklaces Thread Cheerios onto yarn. Pincer grasp + bilateral coordination + you can eat your creation!
- Clothespin Games Clip clothespins around edge of bowl or cardboard. The pinching motion strengthens the exact muscles needed for pencil grip.
- Picking Up Small Objects Use fingers (not whole hand) to pick up beads, buttons, pennies, small toys. Place into container.
- Play Money Sorting Sort coins by type. Pick up with pincer grasp, place in correct pile.
- Bead Stringing Start with large beads and thick string. Progress to small beads and thin string.
- Q-Tip Painting Paint using Q-tips (cotton swabs) instead of brushes. Requires pincer grasp control!
Bilateral Coordination Activities (Two Hands Working Together)
- Paper Tearing Tear paper into strips. One hand holds, one hand tears. This bilateral coordination is essential!
- Stringing Beads One hand holds string, other hand threads bead. Perfect bilateral practice.
- Lacing Cards Punch holes in cardboard. “Sew” around edges with yarn. Both hands coordinate.
- Opening Containers Practice unscrewing lids, opening tupperware, opening jars. Bilateral coordination + hand strength.
- Play-Doh Rolling Roll playdough between two hands to make balls and snakes.
- Paper Folding Fold paper in half, quarters. One hand holds, other hand folds and creases.
Drawing & Coloring Activities
- Daily Free Drawing Provide paper and crayons. Let them draw whatever they want. Regular practice matters more than structured activities!
- Tracing Shapes Trace circles, squares, triangles. Builds hand-eye coordination and pencil control.
- Mazes Age-appropriate mazes build pencil control. Start with wide paths, progress to narrow.
- Dot-to-Dot Connect numbered dots. Number recognition + pencil control + following sequence.
- Coloring Pages Start with large areas, progress to detailed coloring. Encourage staying in lines but don’t demand perfection.
- Rainbow Writing Trace same shape/letter multiple times with different colors. Creates rainbow effect while practicing formation.
- Draw and Label Child draws picture, then you help label parts. “What’s this? A house. Let’s write ‘house’!”
- Copying Shapes Show a shape. Can they copy it? Start simple (circle, cross), progress to complex (diamond, face).
Manipulative & Construction Activities
- Puzzles Start with 20-piece, progress to 50-piece. Fine motor + problem-solving!
- Legos & Building Blocks Snapping legos together and pulling them apart builds incredible hand strength.
- Pattern Blocks Create designs with pattern blocks. Precise placement requires finger control.
- Geoboards Stretch rubber bands around pegs to create shapes and designs.
- Lite-Brite or Pegboards Place small pegs into holes. Pincer grasp + visual-motor coordination.
- Snap Beads Beads that snap together. Building and taking apart = hand strength.
Real-Life Practical Activities
- Spreading with a Knife Spread butter, cream cheese, or peanut butter on toast or crackers using butter knife.
- Pouring Practice Pour water, rice, or beans from one container to another. Wrist control + coordination.
- Buttoning & Zipping Practice on own clothes or use dressing frames. Essential self-care skills!
- Setting the Table Carry plates, place utensils precisely. Practical + fine motor.
- Peeling Fruits Peel bananas, oranges, hard-boiled eggs. Real-life finger strength!
- Stirring & Mixing Help cook! Stirring, mixing, whisking all build wrist and hand strength.
Writing Preparation Activities
- Vertical Surface Writing Tape paper to wall. Draw, color, write on vertical surface. Easier than horizontal!
- Salt Tray Writing Fill tray with salt or sand. Write letters/numbers with finger. Multi-sensory + no pressure.
- Shaving Cream Writing Spray shaving cream on table. Write in it! Sensory + fun + mess = memorable learning.
- Wikki Stix Letters Use Wikki Stix (waxy strings) to form letters. Tactile learning.
- Name Writing Practice Daily practice writing first name. Consistency builds muscle memory!
When Worksheets Are Appropriate (And How to Use Them)
Worksheets have a place in Pre-K fine motor development—but they’re not the primary teaching tool.
The Right Way to Use Fine Motor Worksheets
Worksheets are for PRACTICE, not teaching.
Wrong approach: Hand child worksheet. Hope they figure out how to trace letters. Get frustrated when they don’t do it “right.”
Right approach:
- Teach skill hands-on (form letter in playdough, trace in sand)
- Practice skill in multiple ways (paint it, build it, trace it large)
- Use worksheet as ONE form of practice (5-10 minutes)
- Celebrate effort, not perfection
When to introduce worksheets:
- Mid Pre-K year (ages 4.5-5)
- Only after skill is understood through hands-on practice
- As supplement to (not replacement for) hands-on activities
- Keep it short! 1-2 pages maximum
Types of worksheets appropriate for Pre-K: ✅ Pre-writing strokes (lines, shapes)
✅ Letter tracing (large letters with starting dots)
✅ Number tracing
✅ Cutting practice (lines and shapes)
✅ Simple mazes
✅ Dot-to-dot
✅ Pattern completion
Types to AVOID: ❌ Small, detailed worksheets (too hard!)
❌ Multiple pages at once (too much!)
❌ Timed activities (creates stress)
❌ Worksheets as punishment or busy work
If child resists worksheets: Back off! More hands-on practice needed. Worksheets should never cause tears or frustration.
Making Fine Motor Practice Fun (Not Frustrating)
The key to building fine motor skills is consistent practice—but if it’s frustrating, children will avoid it. Here’s how to keep it positive.
Strategies for Positive Practice
- Keep Sessions Short 5-15 minutes of focused fine motor practice is plenty! Stop before frustration sets in.
- Offer Choices “Do you want to do playdough or cutting today?” Autonomy = engagement.
- Make It Playful Turn practice into games. “Can you cut all the way to the end of this line without stopping?” Competition makes it fun!
- Celebrate Effort, Not Perfection “You worked so hard on that! I see you trying to stay in the lines!” Focus on improvement and effort.
- Show Progress Save work samples monthly. Compare: “Look at your writing from September and now! See how much stronger your hands are!”
- Integrate into Daily Life Real-life tasks (helping cook, setting table, dressing) build fine motor skills naturally without feeling like “practice.”
- Don’t Compare “Your friend writes neater” or “Your sister could do this at your age” = discouragement and shame. Focus on YOUR child’s growth.
- Know When to Take a Break If child is truly frustrated, stop. Try again tomorrow. Forced practice creates negative associations.
Common Fine Motor Challenges & Solutions
Challenge: “My child still uses a fisted grip at age 5.”
Solution:
- Focus on hand strengthening first (playdough, squeezing activities)
- Try short crayons (can’t grip with whole fist)
- Use vertical surfaces (easier grip)
- Try pencil grips
- If no improvement by age 5.5, consult occupational therapist
Challenge: “They can’t cut on lines—the scissors just chew the paper!”
Solution:
- Check scissors: Are they child-safe and sharp enough? (Yes, kid scissors need to be sharp enough to cut paper cleanly!)
- Check hand: Right-handed scissors for right hand, left-handed scissors for left hand
- Practice proper hold: thumb on top
- Practice on easier materials first (playdough, straws)
- Remind: turn the paper, not the scissors
Challenge: “My child writes letters but they’re all different sizes and spacing.”
Solution: This is normal for Pre-K! Consistent sizing and spacing develop in kindergarten and 1st grade. For now:
- Use lined paper with wide spaces
- Practice letters on large scale first
- Don’t over-correct—celebrate that they’re writing!
Challenge: “They mix up b and d constantly.”
Solution: Completely normal! Letter reversals are typical until ages 7-8. Their brains are still developing ability to distinguish mirror images.
- Gently model correct orientation
- Use multi-sensory teaching (form letters with body, playdough)
- Don’t stress or over-correct
- If still reversing after age 8, mention to teacher
Challenge: “My child avoids fine motor activities completely.”
Solution: They may have weak hands and avoid tasks that are hard. Focus on:
- Strength-building activities disguised as play (playdough, squeezing, climbing)
- Very short sessions (3-5 minutes)
- High-interest activities (dinosaur tracing, coloring favorite characters)
- Celebrate tiny victories
- If avoidance is extreme, consult occupational therapist
Frequently Asked Questions About Pre-K Fine Motor Skills
Should my 4-5 year old be writing in cursive? No! Cursive is typically taught in 2nd-3rd grade, after print is mastered. Focus on uppercase print letters first. Lowercase print comes in kindergarten. Cursive comes much later.
My child is left-handed. Do I need to do anything differently? Yes—use left-handed scissors! They cut differently than right-handed scissors. For writing, teach left-handed pencil position (paper tilted right, hand below line of writing). Model with your left hand if possible, or find videos of left-handed writing.
How much handwriting practice should Pre-K children do daily? 5-10 minutes of actual writing practice is plenty! But they should have 20-30 minutes of varied fine motor activities throughout the day (playdough, cutting, drawing, manipulatives).
Is it bad if my child still uses finger counting? Not a fine motor issue! Finger counting is a legitimate math strategy. Most children naturally transition to mental math in 1st-2nd grade.
My 5-year-old still can’t tie shoes. Should I worry? Shoe-tying is difficult! Many kindergarteners still can’t tie shoes—that’s normal. Most learn between ages 5-7. Use Velcro shoes for now, practice tying when there’s no pressure (not when rushing out the door!).
Should I buy special handwriting programs or tools? Not necessary for most children. Free practice, playdough, and regular hands-on activities build skills effectively. If your child has significant struggles, an occupational therapist can recommend specific tools. But most kids don’t need expensive programs.
Conclusion: You’re Building Strong, Capable Hands
Every time your child squishes playdough, cuts paper, draws pictures, or practices writing their name, they’re building the foundation for academic success, independence, and confidence.
Strong hands = easier kindergarten = more confident learner.
Remember:
- Playdough daily (seriously—it’s that important!)
- Hands-on practice beats worksheets
- Multi-sensory learning (see it, hear it, do it, touch it)
- Short, positive practice sessions
- Celebrate effort and progress
- Use real-life tasks (cooking, dressing, setting table)
- Be patient—skills develop over time
Your Pre-K child’s hands are getting stronger every day. Keep providing opportunities, keep celebrating growth, and watch them become capable, confident kindergarteners!
Continue your Pre-K journey:
- Pre-K Kindergarten Animal Alphabet Workbook – Habitats Tracing Handwriting Dot Marker
- My Busy Book – Cut Match Activities for Preschool and Kindergarten
- Preschool Skills Assessment – Pre-K Portfolio Kindergarten Readiness
- Ultimate Homeschool Planner – Complete Learning Kit
Want fine motor activities built into every day of your Pre-K year? Our Complete Pre-K Curriculum includes daily fine motor practice, progressive handwriting instruction, cutting activities, and hands-on strengthening exercises—all integrated naturally into academic learning. No guessing what to practice or when. Build strong, kindergarten-ready hands without stress or expensive programs!
")
")
")
")
")

")
")
")
")